Showing posts with label recipe. Show all posts

Wednesday, December 7, 2011

Christmas Appetizer: Bite-size Pastry Scrolls

As a self-confessed desserts junkie I sometimes struggle when it comes to thinking up appetizers that can be prepared quickly. On Sunday I was down to the wire with time and I realised that I didn't have quite the right amount of savoury to balance out our sweet buffet. As we all know, necessity is the mother of invention and so with some extra ready-rolled pastry in my freezer for inspiration, and an hour until guests started arriving, the bite-size pastry scrolls were born!
What follows is not really a recipe per say but rather a guide as to how I put them together. I did not think at the time to take progress photos so these will have to follow in a future post.


Pumpkin Feta Pastry Scrolls


Ingredients:
1 medium butternut pumpkin (squash)
50 grams feta
1 tablespoon dried oregano
1 (24cm x 24cm) sheet ready rolled puff pastry


Method:

  1. Preheat the oven to 180 degrees Celsius and line a baking tray. Slice a 1 inch thick round off the end of the pumpkin and store the rest covered in refrigerator for future use.
  2. Peel this round and thinly slice it into strips. Cook in a microwave safe container for about 2 minutes or until tender. Separate strips and lay on paper towels to cool and drain.
  3. Lay sheet of ready rolled puff pastry on a piece of baking paper and crumble feta evenly across the surface. Sprinkle with dried oregano.
  4. Lay strips of pumpkin across the pastry.
  5. Starting with the side closest to you begin to roll the pastry up like you would a map without incorporating the baking paper in the roll.
  6. Once you have a pastry cylinder, wrap it in the baking paper and place in the freezer for about ten minutes, this will make it much easier to slice.
  7. Using a serrated edge knife cut the scroll into 1.5cm widths. Use a delicate touch to avoid bending the rounds too much out of shape.
  8. Place on the lined baking tray and bake for 15 minutes or until pastry is puffed and golden.
  9. These are great served warm or at room temperature.

And now for version two!


Capsicum and Spinach Pastry Scrolls


Ingredients:
1 sheet (24cm x 24cm) ready rolled puff pastry
1/4 cup tomato paste
1 tablespoon dried oregano
1/2 red capsicum
Handful of baby spinach leaves
1/2 cup grated cheese

Method:

  1. Preheat oven to 180 degrees Celsius and line a baking sheet with paper.
  2. Thinly slice red capsicum into strips.
  3. Lay the pastry sheet onto some baking paper and spread with the tomato paste. Sprinkle with the dried oregano and then the baby spinach leaves.
  4. Layer capsicum strips across spinach and sprinkle with grated cheese.
  5. Starting with the side closest to you begin to roll the pastry up like you would a map without incorporating the baking paper in the roll.
  6. Once you have a pastry cylinder, wrap it in the baking paper and place in the freezer for about ten minutes, this will make it much easier to slice.
  7. Using a serrated edge knife cut the scroll into 1.5cm widths. Use a delicate touch to avoid bending the rounds too much out of shape.
  8. Place on the lined baking tray and bake for 15 minutes or until pastry is puffed and golden.
  9. These are great served warm or at room temperature.

I hope these recipes come in handy for any holiday season celebrations that you may be hosting this year. I am very excited today because we are finally putting up our Christmas tree.
Of all the holiday activities this one signals the real beginning of the season for me. We have the perfect evening, gloomy and raining, and I think I will bake some ginger biscuits to fuel us through the sorting of the lights and baubles, the garlands and the trinkets. Christmas has begun!

Wednesday, November 9, 2011

Pumpkin Spelt Flour Muffins

So you might have noticed that I do a little bit of baking...okay, okay, a lot of baking. I have to tell you that actually don't eat most of what I post on here as my stomach doesn't make friends with wheat very well.
Luckily nowadays there are so many options and I have founds spelt flour works incredibly well in most recipes that use wheat flour (please note: spelt is not gluten free, just wheat free).
After seeing so many delicious pumpkin recipes circling around the internet lately I knew that I had to have some of that gorgeous gourd in my baked goods.
Therefore I took a recent recipe that had peaked my interest and baked it with spelt, and made a few other little chickpea twists as well.
Please enjoy.


Spelt Flour Pumpkin Spice Muffins


Adapted from Skinny Taste.
Makes 13 medium size muffins and 1 little muffin for a friendly canine.


Ingredients:
1 1/2 cups butternut pumpkin puree
1/4 cup brown sugar
1/2 golden caster sugar
1 1/2 cups wholemeal spelt flour
1 teaspoon baking soda
1 teaspoon mixed spice
1/4 teaspoon ground ginger
1/2 teaspoon cinnamon
1/4 teaspoon salt
2 tablespoons olive oil
2 large egg whites
2 teaspoons vanilla

Method:
  1. Preheat the oven to 200 degrees Celsius and grease 13 cups of a medium size muffin tin
  2. In a large mixing bowl place the pumpkin purée, olive oil, egg whites and vanilla, and mix until well combined.
  3. In a separate bowl whisk together the rest of the ingredients.
  4. Add the wet ingredients to the dry and mix gently, try not to over mix. 
  5. Spoon into greased muffin tin and sprinkle with pumpkin seeds. Place in the oven and bake for approximately 12 - 15 minutes or until the tops bounce back when lightly pressed.
  6. Allow to cool in the tin for 5 minutes before removing to cool completely on a wire rack.

These muffins are delicious when they are warm out of the oven spread with a little bit of jam, or plain. 
I need jam in my life though.
I also froze these tightly wrapped in plastic wrap and they defrost very well in the microwave.

I had a little extra batter left over - just the right size for a Molly treat (sans pumpkin seeds of course).
Oh yes, life is tough round here for a dog.

Wednesday, November 2, 2011

Nothing Goes To Waste

I believe in life, as in the kitchen, that nothing should go to waste.
Time, opportunity, inspiration, talent, hope, love; these are all gifts of the universe that should never be easily discarded.
There are an infinite number of minutes that my human heart will beat in this life; we all pass through time much faster than we would like.
Opportunities are often only presented to us once, take adventure in your hands when it comes flowing into your life; just give into the ride sometimes.
Inspiration, that thread of our muse's laughter that we catch the barest whisper of at times. Follow it's song, you never know what parts of your soul you may uncover.
Don't hide your light under a bushel, or a life not lived. When you feed your talent, when you let it shine and make use of it in your life; you are not only filling your life with light, you are shining it on others.
Hope. Four letters whose power can never be underestimated. The binding agent for all of human kind. The protector of our hearts and souls in the darkest of times.
Love.
There is no greater crime in this life than to waste an opportunity to love. Show your love for those who are closest to your heart. Let others love you in return.
Fall shamelessly every day.
Never waste these gifts, for you never know when there will be none left to open.


When it comes to food, I don't believe in waste either. So when I remembered the fresh blueberries I had purchased on the weekend were still sitting in the fridge I knew that I needed to get baking.
Fresh blueberries (especially when they are on sale) are a real gift in Brisbane. They have a short lifespan here in this hot climate and so whenever I see them in the supermarket I treat myself to a punnet.
Unfortunately I forgot about them, and so now they have new life in these muffins that will be enjoyed by my co-workers for morning tea tomorrow.
Friendship, and an opportunity to foster it, is another gift that should not be left to waste.


Blueberry Muffins
Adapted from '100 Favourite Muffins and Slices' by Simon and Alison Holst


Ingredients:
1 - 1 1/2 cups fresh or frozen blueberries
1 cup plain wholemeal flour
3/4 cup self raising flour
2 teaspoons baking powder
1 teaspoon cinnamon
1/2 teaspoon salt

1/2 cup apple purée
3/4 cup golden caster sugar
1/4 cup olive oil
1 large egg
1/4 cup plain yoghurt
1 1/2 teaspoons vanilla essence

Method:

  1. Heat oven to 200 degrees Celsius and line 18 holes of two regular muffin pans with paper.
  2. Mix together flours, baking powder, salt and cinnamon.
  3. In a separate bowl mix together apple purée, sugar, oil, egg, yoghurt and vanilla.
  4. Add flour to wet ingredient mix and stir until just combined (there should be some streaks of flour still visible).
  5. Add blueberries and gently (very gently) fold through mixture so that you avoid breaking up the berries.
  6. Spoon mixture between the cases and gently slide pans into the oven.
  7. Bake for about 12 - 15 minutes, then remove from oven and allow to cool in tins for 5 minutes before removing to cool completely on wire racks.
Enjoy.

Tuesday, November 1, 2011

A Simple Spicy Cookie for Tuesday

I was born into a stable home, a place I have lived for my entire life up to this point. But I have always felt the pull of faraway lands, exotic experiences, daring adventures; the beat of a misplaced gypsy heart.
However, sometimes I crave the simplicity of the everyday. The comfort of home style and handmade.
On a wet spring night, all I really want is a good book, a warm jumper, a cup of tea and cookie on the saucer beside it.
These cookies call to mind far off lands with their date and spice studded dough, but the texture, the very warmth that emanates from the act of eating a cookie are comfortingly familiar.
Please enjoy.


Date, Walnut and Cinnamon Cookies

Inspired by 'Indulgence Cookies' from Murdoch Books.
Makes 24 Cookies
 
Ingredients:
125g unsalted butter, softened
140g brown sugar
1 teaspoon vanilla
1 egg yolk
1/2 cup chopped dates
1/2 cup chopped walnuts, toasted
100g plain flour
110g plain wholemeal flour
1/2 teaspoon baking powder
2 teaspoons cinnamon

Method:
  1. Preheat oven to 180 degrees Celsius and line two baking sheets with baking paper.
  2. Cover dates with boiling water and leave for about 10 minutes, then drain well and chop.
  3. In a small bowl whisk together flours, baking powder and cardamom.
  4. Cream together butter, sugar and vanilla until fluffy using electric mixer (or really working those arm muscles).
  5. Add egg yolk and beat until just combined.
  6. Pour in dates and walnuts and stir with wooden spoon to combine.
  1. Add flour mixture and stir until a soft dough forms.
  1. Refrigerate for 30 minutes to make dough easier to shape.
  2. Roll tablespoons of mixture into balls and place on trays about 4cm apart and flatten slightly.
  3. Bake for 10-12 minutes or until the edges begin to turn golden brown.
  4. Allow to cool on tray for a few minutes then transfer to a wire rack to cool completely.

These pair perfectly with a good cup of Irish breakfast tea.


Tuesday, October 18, 2011

Anticipation White Chocolate Hazelnut Blondies

There come those times in our lives when we are on the cusp of either celebration or commiseration, thus finding ourselves in the state of anticipation. Being one of the least patient people I know, anticipation is a state that I like to keep driving through until I see the 'Thank You for Visiting' sign receeding in my rear view mirror and the landscape that lies beyond filling my windscreen.
This week in my office the professors found themselves in the state of anticipation. Actually it has been a long six months of work leading up to a few more weeks of anticipation as they first prepared grant proposals and then sat back and waited to see if their funding would be approved. My input in these proposals has been minimal as I sit on the other side of the fence and work on projects that have already been approved; however I have seen the amount of work going put in by professors and research assistants and so all I had to offer was an anticipatory batch of blondies.
They are the state food of anticipation after all, and they make the journey that much easier to bear.


White Chocolate Hazelnut Blondies
Adapted from Martha Stewart.

Ingredients:
1/2 cup butter, softened
1 2/3 cup plain flour
1 teaspoon baking powder
1 teaspoon salt
1 cup packed brown sugar
2 large eggs
2 teaspoons vanilla extract
3/4 cup milk chocolate chips
3/4 cup unsalted hazelnuts, chopped

Method:

  1. Preheat oven to 180 degrees Celsius and line a 9 inch by 13 inch pan with baking paper.
  2. Spread chopped hazelnuts across another rimmed baking sheet lined with paper and toast in the oven for ten minutes. Remove from oven and allow to cool.
  3. Meanwhile put flour, salt and baking powder together in a bowl and whisk to combine.
  4. Beat butter and sugar together in the bowl of a stand mixer until light and fluffy.
  5. Add eggs and vanilla to butter mixture and mix until combined.
  6. Reduce mixer speed to low and beat in flour mixture. Scrape down sides of the bowl and mix until well combined.
  7. Add chopped chocolate and toasted nuts and mix by hand.
  8. Spread mixture in prepared tin and place in the oven. Bake for 35-40 minutes or until a cake tester comes out with just a few moist crumbs clinging lovingly to it.
  9. Cool in pan, then lift out and slice into pieces.
  10. Let anticipation recede as you take the first chocolate and nut filled bite.

Just so you know, we did get the grant! Congratulations professor and all your hard working research assistants!

Now, for a little more sugar....

Cupcakes for a birthday at Mum's work tomorrow!


And these are teaser for my Thursday post which will be all about 'Calories for a Cause', the pink morning tea that two friends and I are holding at work to raise some money for a local breast cancer charity.


Sweet dreams chickpeas.

Tuesday, October 11, 2011

Dark Chocolate Chip Oat Cookies

I would like to say a huge thank you to everyone who has read and commented on my last two posts. I know that the last post 'Saying a Final Goodbye to Yesterday' was a little (okay, a lot) darker than most of the other essays that appear on One Chic Chickpea but I had finally dealt with something that had lingered for too long and I wanted to put it somewhere public to remind me, lest should I ever forget that I have closed that chapter. 
So thank you, and I thought of you all when this greeted me this morning.

Now for the food portion of my post today.
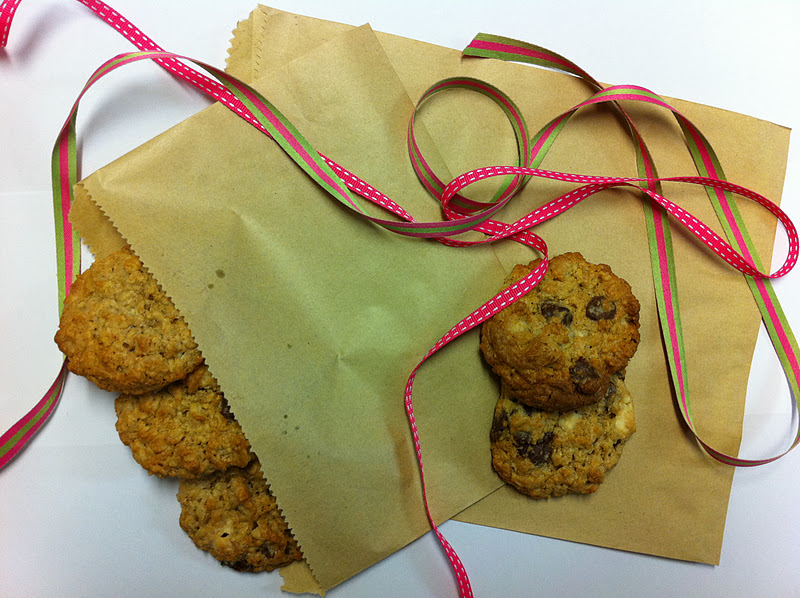
There is something about an oat cookie that evokes images of country kitchens; a delft blue tablecloth on a round table bearing a plate piled high with cookies and a clear glass jug full of ice cold milk to accompany the freshly baked goods whose scent fragrances the air with its cinnamon vanilla perfume. This is the little fantasy that wove itself through my mind as I stirred this batch of lovelies up. For an hour while I mixed and they turned golden brown and chewy in the oven I was a million miles away from suburbia in my own little cottage in the middle of nowhere listening to the trees grow and watching the spelt wave in the breeze.


Dark Chocolate Chip Oat Cookies
Makes about 48 cookies (or 47 if you taste test before the oven!)

Ingredients:
200 grams of butter, softened
200 grams caster sugar
80 grams brown sugar
2 eggs
2 tablespoons milk
1 teaspoon vanilla bean paste (you can use vanilla essence if you do not have paste)
200 grams wholemeal self raising flour
1 teaspoon cinnamon
200 grams rolled oats
100 grams instant cooking oats
150 grams dark chocolate chips

Method:
  1. Preheat the oven to 200 degrees Celsius and line three large cookie sheets with baking paper.
  2. In a large mixing bowl beat butter, sugars, eggs, milk and vanilla bean paste until creamy and smooth.
  3. Add flour, oats, cinnamon and chocolate chips. Stir the dry mix gently but thoroughly through the butter and egg mixture.
  4. Drop rounded teaspoons of mixture onto the lined cookie sheets, leave about 5 centimetres (2 inches) between each round of mixture as the cookies will spread while baking. 
  5. Bake for 12 - 15 minutes or until the cookies edges are lightly browned.
  6. Allow to cool completely before packing into an air tight container.  
Chickpea Customisation: You can replace the dark chocolate chips with any other variety of chocolate you might prefer, or instead you could use dried fruit or nuts in place of the chocolate. 


So come into my (imaginary) country kitchen and pull up a chair. I'll pour us some milk and we can dunk our cookies and just drift away on the breeze for a little while...

Sunday, October 2, 2011

Spring Sunday and Date Almond Cake

Spring weather in Brisbane fluctuates between damp overcast days where you are certain winter has not yet abandoned her grip on the city, and days of bright blue unclouded skies where the very wind seems to whisper of the promises of summer. Today was of the latter variety, a day bathed in sunshine and cooled by dry cool breezes that have blown through the newly opened spring flowers.
Something inside of me needed to celebrate the coming of the warmer months and so I headed out for a run through my neighbourhood; passing gardens bursting into bloom under the newly strengthened sun, and soaking up the feeling of just being out in the world on such a beautiful day.

Of course no normal Sunday would be complete without a decent amount of time in the kitchen, and so the Date and Almond Cake was born. I had been reading 'French Kitchen' by Serge Dansereau this morning and was captured by the thought of his almond bread. However, I needed to put a chickpea twist on the recipe and so flours were changed, dates were soaked in tea and added to the batter and even the sugar took on a different guise.


Date and Almond Cake
Adapted from 'French Kitchen' by Serge Dansereau


Ingredients:
225g butter, softened
150g raw caster sugar
3 eggs
150g white self raising flour
125g wholemeal self raising flour
75g almond meal
Zest of half a lemon
125mL milk
3/4 cup of dates
3/4 cup boiling water
1 English breakfast teabag

Method:

  1. Preheat the oven to 180 degrees Celsius and butter and line an 8 inch spring form pan
  2. Place dates in small bowl with the teabag and pour boiling water on top. Allow to sit for 15 minutes before draining and roughly chopping. Set aside for later use.
  3. In a medium bowl combine flours and almond meal with a whisk ensuring there are no lumps.
  4. In the large bowl of a stand mixer cream together butter and sugar until pale and fluffy.
  5. Reduce to low speed and add eggs one at a time, mixing well between additions.
  6. Add flour and almond meal mixture and combine.
  7. Beat in lemon zest, followed by milk and mix well.
  8. Add chopped dates to the dough and mix through by hand using a long handled scraper.
  9. Pour batter into the pan and bake for 45-50 minutes. If it starts to brown too quickly cover with tin foil.
  10. Remove cake from oven when a skewer inserted in the middle comes out clean, allow to cool completely in pan before releasing.


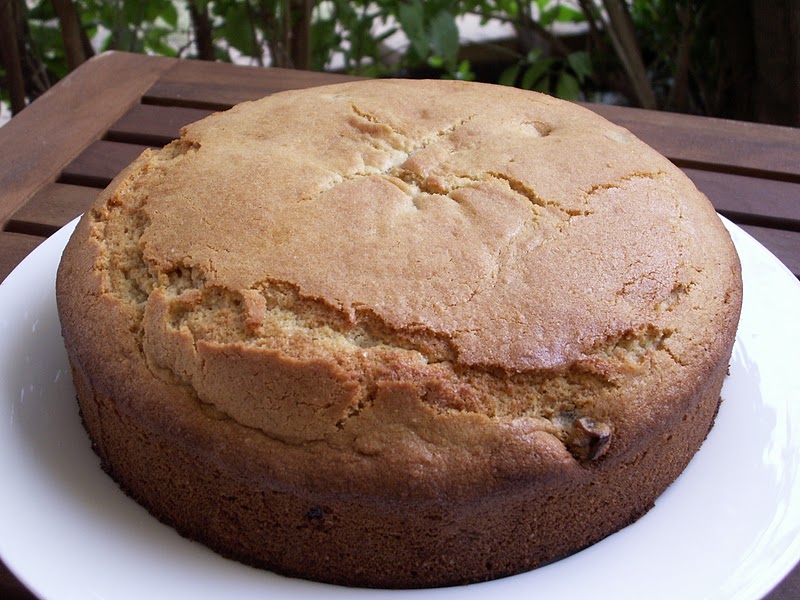
This cake is destined for the office tomorrow where its damp almond smell and moist crumb will be well appreciated on a Monday morning when all you want to do is be outside in the spring sunshine.

Wednesday, August 17, 2011

Kairos and a Cookie

In ancient Greece there were two words for time.
Chronos, which is the time we live by everyday, sequential time, something that can be counted by your lovely shiny watch.
The other, was Kairos; a time between time, that cannot be counted and in which something special happens.

Chronological time rules most of human existence, we schedule meetings, time for working out, eating, and nearly every other task.
Kairos, that time apart, is an effort to find, but a worthy pursuit.
I have written about everyday grace many times before, but Kairos is something a little more than that. It is more ritualistic, for some it is religious, but it does not have to be.
It is an endeavour to get to Kairos; we must create the right conditions, force ourselves into that time between time, still the clocks of Chronos that chime in our head all day. We must search for that quiet space inside ourselves where an undefined time swirls and feeds something inside us, sometimes deeper than we know.

Kairos might be a ritual we allow ourselves once per week, a moment alone in a pursuit that pleases us entirely, a space inside us that feeds our soul and does not answer to the tick of the clock. It could be a Saturday afternoon walk by yourself in the quiet. A glass of wine, a book and a cat curled up on your lap on Friday night when everyone else is out of the house.

Kairos can also be shared, a time for our family, friends, community of our hearts, to spend moments together forging connections that are based on deeper understanding and enjoyment that goes undefined, happiness felt, not spoken. A sushi lunch date with a friend once a week. Sunday morning pancakes with the family.

Kairos does not have to be scheduled, it can be spontaneous a one time ritual that still means so much. This afternoon the house was quiet, the day was wrapped in grey clouds and I was alone in the house with a batch of freshly baked cookies singing their siren song. I knew that there was a moment of Kairos waiting for me, I just needed to recognise it and grab the opportunity to nourish that part of myself that often gets forgotten in the everyday. I made it into my own afternoon ritual; I plunged some coffee, the bitter nutty smell promising something in the time beyond, picked out the cookie that most appealed to me with it's greedy chunks of chocolate still soft from the heat of the oven, and pushed my chair into the best position to view the deep green garden and soft woolly clouds. I settled myself, took a breath to clear the hands of time away and opened the doorway in my mind through which I access time between time. The coffee and chocolate melted together in harmony, more than just the sweet and bitter; they spoke to me of the work I had taken crafting the cookies, the beauty in waiting for them to bake, the treat of allowing myself an indulgence of both chocolate and time.

I recommend you find Kairos in your own life. Make time to access that place of no minutes or hours. By yourself, or with others. Take time for a little ritual. Place yourself between the hands of the clock where you can't see them move and find that something great beyond the chime of Chronos.

It's all about chunk to dough ratio!

Chocolate Chunk Spelt Cookies


Ingredients:
60g butter, softened
60g raw caster sugar
1 egg
1 teaspoon vanilla bean paste
180g wholemeal spelt flour
1 teaspoon baking powder
75g dark chocolate chopped into chunks

Method:

  1. Preheat oven to 180 degrees Celsius and line a cookie sheet with baking paper.
  2. Cream butter and sugar until fluffy, then add vanilla and egg and beat to combine.
  3. Add flour and baking powder and mix until incorporated. The mixture might be a little stiff but keep working at it, the pay off is worth it!
  4. Add chopped chocolate and mix through batter.
  5. Roll tablespoons of mixture into balls and place evenly spaced apart on the lined cookie sheet.
  6. Cook for about 15 minutes and then remove to cool on a wire rack.
  7. Enjoy, in a moment of Kairos.

Saturday, August 13, 2011

Happy Vege-versary to Me!

One year ago exactly I woke up and decided I was a vegetarian.
I had been pondering this decision for some time for a few different reasons.
Firstly, I had been having some stomach problems for a while and eating meat (and wheat) seemed to aggravate them.
Secondly, I had just read Alicia Silverstone's 'The Kind Diet' and the gentle way she speaks about her lifestyle choices, and the benefits of a vegan diet had me inspired to see if such a change would have similar effects for myself.  
I had also started running a little more seriously and become devoted to 'No Meat Athlete', a fabulous vegetarian/vegan running blog.
I had chosen a somewhat challenging time to begin my new lifestyle as I was just about to depart for Italy, the land of salumi, bresaola, prosciutto, not to mention spaghetti bolognaise, bistecca all fiorentina (beefsteak Florentine) amongst other meaty and fishy delights. 
While I was travelling I enjoyed gorgeous cheeses, fresh fruit and vegetables, amazing porcini risotto, spaghetti with zucchini flowers, gelati in a rainbow of colours, and countless other delights.


Upon returning home I learned how to prepare different beans and lentils, started cooking new grains, and discovered some enthusiasm in the savoury side of the kitchen that I thought was reserved for baking alone.
Also, in the grand tradition of this chickpea, I purchased quite a number of vegetarian and vegan cookbooks and collected recipes wherever a scent caught my taste buds. 


Over the past twelve months I have discovered a way of eating that works for me, that makes my tummy tingle with excitement at every meal time (and in between). I still cook meat for my omnivorous family and friends, and although I have tried and enjoy some of my vegan baking adventures I still cook with eggs and real butter.
More important than labels though is that I have found a way of eating that leaves me at peace with my body, and every mouthful I take. I believe that everyone is a little different in what works for their body, and for me, plants are the way to go! 

To celebrate Mum, Dad and I had Sundried Tomato Lentil Stuffed Field Mushroom with Baked Kipfler Potato and Caramelised Leek Salad.


Sundried Tomato Lentil Stuffed Field Mushrooms
Serves 3-4 depending on the size of your field mushrooms!


Ingredients:
1 400g can of brown lentils (or equal amount of lentils cooked from dried)
1 onion, diced
3 sundried tomatoes packed in oil, 1 teaspoon of oil reserved, tomatoes chopped finely
1/4 cup of black olives, chopped
2 tablespoons of tomato paste
Pinch of dried oregano
3 - 4 medium field mushroom, stalks removed
1/3 cup grated cheese

Method:

  1. Preheat oven to 200 degrees Celsius and place mushrooms on a lined baking tray, undersides up.
  2. Once the oven is at the right temperature, put mushrooms in the oven and bake for about 10 minutes, then remove.
  3. Now, use the reserved olive oil to fry off the onion then add lentils, sundried tomatoes, olives, tomato paste and dried oregano. Cook until warmed through then remove from heat.
  4. Spoon lentil mix into mushrooms and then sprinkle with the cheese and place back in the oven to melt the cheese.

Baked Kipfler Potato and Caramelised Leek Salad


Ingredients:
500g Kipfler potatoes, scrubbed and thickly sliced
1 leek, white and light green parts only, chopped
1 cup green beans, ends trimmed and cut in half
Large pinch of sea salt
2 tablespoons flaked almonds
1 1/2 tablespoons macadamia or olive oil
Large handful of rocket leaves

Method:

  1. Preheat oven to 200 degrees Celsius.
  2. Toss potatoes with 1 tablespoon of the oil and the sea salt. Scatter over a lined baking tray and bake for about half an hour , until nice and crispy.
  3. While potatoes are baking fry leeks with the remaining oil until soft. Add flaked almonds and continue cooking until almonds are lightly browned, remove from heat.
  4. Steam beans in the microwave for 1 1/2 minutes.
  5. Place potatoes, leeks mixture and beans in a bowl and toss with another pinch of salt and the rocket leaves.

After dinner, since it isn't really a celebration without some cake! I made Mum and Dad an apple and walnut cake from Tessa Kiros' charming 'Apples for Jam' and served it with ice cream and freshly whipped vanilla bean cream.

After smelling this brown sugar, cinnamon and walnut apple delight baking in the oven all afternoon I will definitely be working on adapting it to a more chickpea friendly version.
Now, I'm off to enjoy the end of Willy Wonka and the Chocolate Factory (the original with Gene Wilder) and dream candy coated dreams.
Happy weekend everyone.

Sunday, August 7, 2011

Sweet and Sweaty Weekend

This weekend has been salty and sweet, an important balance in the flavour of life I feel.
Saturday was definitely the sweet end of the spectrum as Jess, Mum and I attended a high tea with Mum's workmates at the Room with Roses in the city. The venue is in a building called the Brisbane Arcade which was built in the early 1900s and nowadays houses fine fashion houses and other speciality stores, amongst these the Room with Roses, a fine English tea house serving brunch, lunch and high tea to the people of Brisbane. I have been here before several times for tea and each time I have been more than happy with my meal and the service. Saturday was no exception, there were scones, savouries and petit fours a plenty, all chickpea friendly!
My favourite was definitely the raspberry scone topped with raspberry jam and vanilla whipped cream.
Beautiful Jess and Mum! Check out those scones in front!
It was lovely to share tea with some wonderful women and spend an afternoon enjoying a little leftover luxury from a bygone era.

This morning was the salty, sweaty section of the weekend's activities. Jess and I took part in the Brisbane Times 10km race. It was a lovely morning for a race with blue skies, unexpectedly hot weather for winter and a slight breeze off the river that the route followed.
Here we are before we got our sweat on!
I really enjoyed the race this morning. Although I still got my usual bout of nerves as we toed the line, as soon as Jess and I started running I forgot all about that and just enjoyed every moment of spending an hour with my little sister, doing something we both enjoy on a lovely Sunday morning. We chatted during the race, and just having her there was such a gift. As we get older and our lives become busier and take off in different directions it is nice to have that space where it is just the two of us again for a little while. I really treasure every moment I get to just have her as all mine again. Thanks Jess for such a wonderful morning!
Also thanks to our wonderful support crew, Mum and Dad, you definitely deserved your ice cream!

Salty demons!
Yes, one of our main motivations was race bling. This is Jess's first (of many I think!)
After the race the remainder of Sunday returned to the sweet spectrum, and whilst I promised a banana muffin recipe I'm sure you'll forgive me when you take a buttery, almondy, vanillary (all the -y words that make life worthwhile I think) bite of these biscuits.


White Chocolate Almond Fancies


Ingredients:
1 1/4 cup and 1 tablespoon plain flour
3/4 cup icing sugar
155g butter
1/2 cup ground almonds
2 egg yolks
1 teaspoon vanilla bean paste
100g white chocolate
1/2 cup flaked almonds, toasted

Method:

  1. Preheat oven to 180 degrees Celsius and line two cookie sheets with baking paper.
  2. Sift flour and icing sugar into a medium bowl and using your finger tips rub in the butter until it resembles fine breadcrumbs. 
  3. Add ground almonds, eggs yolks and vanilla bean paste and knead lightly with hands until it comes together in a firm dough.
  4. Turn out onto a lightly floured surface and knead lightly until smooth. Roll out with a floured rolling pin to 4mm thickness. Cut out rounds with a 6cm fluted cookie cutter and place on lined cookie sheets about 3cm apart.
  5. Bake for 10-12 minutes, or until just firm and lightly golden on the edges.
  6. Slide baking paper onto wire racks and leave cookies to cool completely.
  7. Once the biscuits are completely cool melt the white chocolate by placing in a microwave safe bowl and heating in short bursts (about 30 seconds) and removing between each to stir chocolate with a metal spoon. Spread chocolate onto biscuits using a small knife and press into flaked almonds.
  8. Set aside on wire racks until chocolate is completely set.
Ooh fancy!
This weekend has been the perfect melange of sweaty and sweet. I think in life it is that balance of saccharine and salt that makes life so interesting, and worthwhile. There are times when it seems we are living in a salt mine and the tears we cry are bitter and never ending. If you are patient, and you take the time to look you can find the sweet that balances the palate of life. Those moments so beautiful that they wipe the memory of the tears, and the trials away. I hope everyone had a sweet weekend, I can't wait to see what delights lay in store this week.

Wednesday, July 27, 2011

A Girl with a Reputation

I am a girl with a reputation.
I might look light and sweet and bubbly on the outside.
Yes, I have been known to skip and whistle, sometimes at the same time.
But I have a dark side.
A very dark side.
A very wicked, dark side....
Oh yes, this chickpea is a girl with a reputation.

I think I should clear this up a little.
I have a reputation for a deep, dark, wicked chocolate cake. In fact this cake has become so synonymous (or should that be sin-onymous ?) with my reputation that it is simply called 'the cake'. No other title necessary.
If you want a cake that will help you make friends, win people over, let you hold them in the palm of your hand, wrapped around your finger, enchant them at first bite and have them begging for more; then this is the cake for you.
This cake is of the sort whispered about in certain circles, dealt out in careful portions, used as barter in lawless places.
The first moist crumb that passes your lips dances on the fine edge of sugar and butter, the second bite topples you over into the grip of something...darker.
At third bite your eyes glaze over, you will involuntarily whimper, and yes, you may even drool a little as the chocolate and coffee drag you into their domain.
When the last crumb is picked delicately from your plate, the last scrape of icing greedily licked from your fingertip and the cake is nothing more than a memory you will be under its spell.
Welcome to the dark side.
I told you I had a reputation....


The Cake
This cake is now the traditional birthday cake of my Mum's workplace. I have been known to receive random phone calls/texts/emails from my mother with one line simply reading 'need the cake for tomorrow'.
 

Ingredients:
1/4 cup strong brewed coffee
200g dark eating chocolate, chopped
200g butter, chopped
2 tsp vanilla extract
1/3 cup cocoa powder
1 cup caster sugar
3 eggs, at room temperature
3/4 cup self raising flour

Method:
  1. Preheat oven to 180 degrees Celsius. Line two 20cm (8 inch) round cake tins and grease the sides.
  2. Place coffee, chocolate and butter in a small saucepan over low heat and stir constantly until melted and smooth. Remove from heat and transfer mix to a large bowl.
  3. While warm stir in vanilla extract and cocoa.
  4. Add eggs one at a time alternating with the sugar, stirring well between additions.
  5. Add flour and use a whisk to gently combine.
  6. Divide mix between two pans and bake for until a skewer inserted in the middle comes out clean, about 30-40 minutes depending on your oven.
  7. While baking lick the bowl.
  8. After removing cakes from oven allow to stand in tins for about 10 minutes, then transfer to a wire rack to cool.
  9. Once completely cooled sandwich together with about 1/3 of the frosting and cover top and sides with remaining mix.

Then cut a slice and earn a reputation for yourself...


The Frosting

Ingredients:
180g butter, softened
3 cups icing sugar, sifted
1/2 cup cocoa, sifted
1/3 cup milk

Method:
  1. Whip butter in the bowl of a stand mixer, or using a hand mixer, until soft and pale.
  2. Add remaining ingredients and beat on medium to high speed until they are combined and change to a lighter colour.
  3. Use on cooled cake.

Of course, lick the bowl here too.

So there you have it, confessions of a chickpea.
Enjoy the dark side...


Also: thank you very much everyone who commented on my last post and wished me well (thanks Katy for your suggestions, I'm off to the pharmacy tomorrow and to spend some quality time with my yoga mat!). I wish I could send all my lovely blog friends a slice of cake!

Monday, July 25, 2011

Super Baking Sunday and Sweet Strawberry Galette

Amy....
Amy come and play...
I heard the voice calling me as I lay awake in my bed on Sunday morning.
Amy...you don't need to sleep any more...come and play with us....
In my dream like state I wandered out of my bedroom and found the source of the saccharin siren's song.
My kitchen.
In all it's empty Sunday morning glory, ingredients in the fridge and a stack of bookmarked cookbooks on the bench it was like I had landed in the middle of my very own Disneyland.
So I rolled up my sleeves, put my apron on, grabbed my spoon and cosied up with my stove to have some Sunday fun.

First of all, there were the 'Black-bottomed Cupcakes' from 'The Hummingbird Bakery Cookbook'. These disappeared to Mum's work this morning and I hope the girls and guys enjoyed the creamy cheesecake topping with a dense brownie base. I might have to make a batch especially for the household sometime soon.

That's right, a brownie base with chocolate chip cheesecake on top.
Bake with sighs of pleasure...
Martha Stewart called out to me next from the bookshelf and amid the pages of her 'Cookies' book I stumbled across 'Marbled Coconut Brownies'. The recipe can actually also be found on line as well.
Not tempted to follow the link?
Let me share some photos with you...

Sunday mornings don't get any better than this.

Whisk it all with love...

So pretty going into the oven. Coconut swirls and dense chocolate.

Even prettier coming out of the oven. This smelt like heaven.

The crackles on top are the best part. Welcome to brownie mountain.
Did you manage to read to the end of the post or have I already lost most of you?
People?
Anyone?
No....

Thank you for rejoining me!
After all this baking for others (the brownies went to Dad's work) I decided that we needed something chickpea friendly for dessert. As I shared on Friday we recently discovered a strawberry farm a very reasonable proximity from our house. We made the required pit stop there on Saturday after the farmer's market and so I had some lovely fresh ruby berries to play around with!
I decided on a galette as it truly showcases the amazing toppings and allows the natural beauty and sweetness of the berries to come through.
Before baking.
I doubled the recipe for the galette crust from  this recipe by La Tartine Gourmande. I had never baked with millet flour before and whilst the dough was a little bitter before baking when it was coupled with the sweet strawberries and baked it provided a lovely backdrop contrast to the fruit.
I just gently combined the sliced strawberries (about 500g) with three tablespoons of caster sugar and about two tablespoons of cornflour (to thicken the juices) before arranging them on top of the base.
Emerging from the oven.
Just a slice of heaven...
Unfortunately after this it disappeared quite quickly so there are no pretty plated up photos. All I can say is that not even the crusts were safe.
Case in point, the little chickpea, my sister Jess.
Should it be pastry then ice cream, or ice cream and then pastry?
Decisions, decisions....

How about both at the same time!!
Happy little chickpea!
Two more happy chickpeas! Casey and I in the kitchen pre- galette apocalypse
So that was my sweet Sunday. A beautiful way to end the week!

Also an update on Molly my beloved special athlete.
After a few weeks of recuperation, a lot of well wishes from all my blog friends, plenty of smooches from Dad and a steady diet of banana bread and honey on toast....
Well, you can see for yourself! Good as new!

Oh Amy, come on one more muffin, please....
I hope you all had a sweet Sunday too!

Thursday, July 21, 2011

Petite Treat Thursday: Vanilla Kisses with Raspberry Butter Cream

There is something about the individual serve that beckons us with its dual personality. On the one hand the single serve is a measure of control, 'oh yes, I'll just have one', we can say, comforted by the fact that once it is gone we have had our share of the goodness, the treat is over.
On the other hand the individual serve is decadent, it's all mine; this cupcake, this biscuit, this ice cream cone, is all mine and I'm not sharing because this is made for one. Just for me.
In honour of the petite treat and it's restrained decadence I am announcing a new theme for Thursdays:
Petite Treat Thursday.
Each week will feature a small treat, something small enough to not be a full blown indulgence but hedonistic enough to satiate our need, our right, to have a little pleasure, every day.

This inaugural Petite Treat Thursday is dedicated to my Dad. The recipe for these vanilla kisses is based on a biscuit recipe that he taught my sister and I to bake when we were little girls. I fondly remember Saturday mornings and Sunday afternoons spent in the kitchen with my Dad and his cracked copy of the 'Australian and New Zealand Complete Cookery Book' deciphering imperial measurements into metric and beating butter, learning to watch how it creamed together with sugar to the right consistency before adding the next ingredients.
Daddy, I loved those moments, they are some of my favourite memories of childhood. During those times you taught Jess and I so much more than how to make shortbread or marshmallows; you taught us that patience  and hard work can turn something basic into something beautiful, that sometimes you can take a basic recipe and add your own flair, it is okay to wing it sometimes in fact it can lead to great discoveries (turquoise icing anyone?), and that at the end of the job it is essential to lick the bowl. Cook's treat of course! So Dad here is a little bit of something you taught me mixed with some things I've picked up on my own.

That's my Daddy!

Vanilla Kisses with Raspberry Butter Cream
Makes approximately 40 individual biscuits, so 20 kisses


Ingredients:
220 grams butter, softened
90 grams icing sugar
150 grams plain flour
125 grams cornflour
1/2 teaspoon baking powder
1 teaspoon vanilla bean paste

Method:

  1. Preheat oven to 180 degrees Celsius and line two rimless baking sheets with baking parchment.
  2. In a medium mixing bowl cream together butter and icing sugar until pale. Then mix in vanilla bean paste.
  3. Add plain flour, cornflour and baking powder and beat until well combined.
  4. Spoon into a large piping bag fitted with a medium star tip. Pipe stars onto baking sheets, leaving room for spreading.
  5. Slide into oven and bake for about 15 minutes. Do not allow to brown, bases of biscuits should be just golden and tops still pale.
  6. Allow to cool completely before sandwiching together biscuits with raspberry butter cream.
Just out of the oven.
Raspberry Butter Cream


Ingredients:
1/2 cup butter, softened
2 cups icing sugar
2 tablespoons raspberry sauce or raspberry jam

Method:

  1. Cream butter until soft and pale
  2. Mix in icing sugar and sauce or jam until well combined.
  3. Spoon a small amount onto one biscuit and place another on top, you now have a kiss!
Note: I used some organic raspberry sauce that was made from whole raspberries. We purchased it from our local farmer's market a little while ago. You can use jam with the same outcome.
My darling vegan friends please note that these can easily be made friendly by using a non dairy margarine, everyone needs petite treats!
Perfect with tea!


I hope you enjoy whatever petite treat you choose to have today.
These kisses are headed to work tomorrow, with one left for Dad to enjoy tonight!